Mixed Media Scrapbook Layout: My Favorite Helper


Hello fellow scrapbookers.  Thank you as always for stopping by for our monthly blog hop featuring this months Clique Kit named Cave Girl.  This month we are using the collection by Pink Paislee "Memorandeum".  I have loved all the creativity this blog hop provides.  I enjoy the hop myself and become inspired by others who have also purchased the kit.  


I am the proud new owner of a Silhoutte Cameo and decided to take advantage of the free cut file available this month and loved this paper clip background.  I had thought about cutting it out on black card stock and decided to still do it with white, because you know I'm going to want to color it up and do some mixed media work with it on my own.  Its not a layout of mine, lately, without mixed media added to the mix.  I will be doing another one here soon using the quote cut file as well.   


I used Dina Wakley Gel Medium from Ranger to adhere the intricate background to the patterned paper Time Clock from the collection.  The kit this month came with the collections acetate cut apart page as well.  I am scrapping a picture of my rescue moxie Kobe on my craft room desk amongst my pictures, patterned paper, pens and brushes so the pencil image was perfect.  I backed it with the white card stock to keep it sturdy.  


I matted my photo with white tissue paper and then used the card stock cut apart to add another layer.  The few empherma pieces used were all cut out of the same paper.  In order to jazz up my layout some more, I needed to add mixed media.  I decided on a few blue brush strokes along the edge would be just enough.  I used cobalt blue, Caribbean  and Ocean breeze from Apple Barrel were perfect. The word 'favorite' in my title is from the kit as well has the colorful alphas from Bella Blvd.  I finished off the layout with some tangled thread, washi tape accents and journaling along the edges.  


Its a bright and cheerful layout and I hope you have enjoyed the close up photos.  I did film a process video: 

Thank you for stopping by.  Here is the list of the other blogs to hop on over too. 


Carpe Diem Planner by Simple Stories

Hello lovely scrapbooker and planner addicts alike.  I have recently purchased the new Carpe Diem Planner by Simple Stories and have been using it for the month of December.  The size is A5 and the binder is similar in size to the A5 Filofax Saffiano I own.  The binder itself does use the six ring system, similar to the Filofax as well.  The inside cover has 6 business card pockets along with a secretarial pocket for larger items.  I chose the color Aqua, but it also comes in pink, coral, robin's egg blue, platinum, and black.  The planner comes undated which allows you the flexibility to start using this planner at any time.  The dividers are labeled with the month and only the label itself is laminated and not the divider.  I may be altering that feature in the future because I know I am rough and it will get abused.  The month is on two pages and is printed on heavier card stock compared to the paper the week on two pages is printed on.  The complete Carpe Diem line has everything to decorate the planner from stickers, die cuts, paper clips, bookmarks, folder pockets, appointment stickers and washi tape that all match.  I am an enabler I know, but all of it is all so lovely.  
The inserts are pretty and semi decorated.  Most planner lovers with continue to embellish their pages some more, but for those who may not have the time to do so, the pages already are minimally decorated.  The planner simply came with the months, weeks and an opening page per month for important dates and goal setting.  There are no other sections provided.  There is a blank pad of lined paper that is held in the back cover pocket.  I have added in my own extra dividers to customize my planner to my needs.  I use inserts to keep track of my YouTube Channel, blog and social media.  
The paper quality for the weekly section is not great.  It is lighter to me than copy paper.  This is my only disappointing aspect of this planner.  I did a first impressions video in which I did a pen test and ink test to show which bleed through or shadow and which can be used on this paper.  

The beauty of having a ring system planner is the customizability.  I have gone back and forth throughout my life to a spiral bound to a binder to hardbound, and round and round I go.  But to have a planner work efficiently for you and your needs, rings is always the way to go.  For the festive month of December I filmed a 'Plan with Me' video if you would like to have a look.  

Thank you for stopping by,
EVI

December Daily: Days 1-6

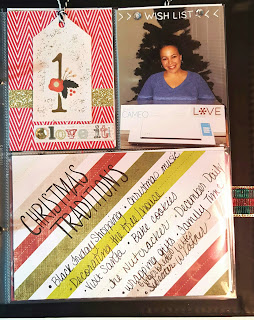
The first week of December has gone by so quickly.  It has been fun completely each page as the day as passed by.  Having my supplies and kit open on my tray on my desk as made the process easy and possible.  If I had to put away my supplies each day I would not get it done.  I have also been filming process videos for this mini album, which has been difficult. I complete my pages at night after work and sometimes my studio lights do not give great lighting.  For next week, I will try a "Flip Through" video to show the completed pages and describe what I used.  That may be a bit easier.  
The goal is to document one story a day and that has been my focus.  I have been lucky enough to have a story I have wanted to capture.  I will admit it is hard sometimes because throughout a normal work week I am in a routine with not that much going on.  So I am taking the time to slow down and look at my life and document the good the bad and simplest regular things that usually would go unnoticed in my life. 
             

I also need to stop the madness of comparing my work to others.  I fall in love with everyone's posted layouts and want to scrap lift everyone's.  I love my album too, I just get so inspired by others.


I think I purchased way too many supplies for my album.  I find myself overwhelmed with all the embellishments I have and try to use as much as I can on each layout, which is simply crazy thinking.  I have no idea why I am putting this much pressure on myself to have this mini album be perfect.  Despite all those little rants, I am still enjoying the process.  LOL.  I have a process video for this first 6 pages in my album for your viewing pleasure.


EVI

December Daily: Supplies


Its is my first time doing December Daily and I have hardly any Christmas themed items in my stash.  It has usually not been my style of scrapbooking.  The concept of December Daily is perfect to do year after year.  Its a tradition I hope I will love to continue even when I have children.  Ali Edwards was the creator or this project, she offers classes and kits to make your album cohesive.  For my first year, I decided to put together my own kit with items I enjoyed.  I did a online shopping as well as craft stores.  I did plenty of research with YouTube to become inspired.    I decided to keep my album very classic and traditional.  I do not do "cutesy" scrapbooking.  I do not want cartoon like santas, elves or snowmen on my layouts.  It is simply not my style. 

I started out with the Heidi Swapp collection "Oh What Fun" 12x12 paper pad, die cuts, stickers and wood veneer purchased on Blitsy.com.  I then loved the My Minds Eye "Cozy Christmas" and "Market Street" ephemera packs and loved the number tags in the set.  I decided to keep traditional Christmas colors of green, red, black, white, kraft and gold accents.  It is the easiest colors to buy an abundance of.   I fell in love with the American Crafts "Deck the Halls" collection and decided on the Project Life value kit which I picked up on allscrapbooksteals.com.  Also from this website were a handful of 12x12 papers from My minds eye, Carta Bella, American Crafts.  I live close to a Michael's and Hobby Lobby, so a few items were also picked up like 6x6 paper pads, stickers, brads and alphas have been collected from these large craft box stores.  I signed up to take the Gossamer Blue December Daily Class this year and I received a 6x8 clear stamp set.  

My organization is on a white acrylic serving tray from Target and a few small bowls.  I tried to fit all my supplies into a plastic Iris 12x12 box that I am sure many are familiar with but it simply did not fit.  I will leave the tray on the side of my craft table that way it is always out and available for me to work with.  It has compartments so that I can see all my supplies and not hide anything.  


The added details to my kit include ribbons, glitter, stamps, dollies, washi tape, red embossing powder and twine from my stash.  This will be my first year participating with this project and I cannot wait to see the outcome.  I feel prepared and organized for this project.  There is a detailed video on my YouTube Channel for your viewing pleasure.  
Evi